Earth Notes: Super-Insulating Our Living Room (2010)
Updated 2025-10-24.Background
For 2009, even given the unusually harsh winter, we managed to cut gas use from 9MWh in previous years to just over 6MWh. Some of that saving was with water heating (behaviour changes, pipe lagging). Not all was from space heating (ie central heating).
My strategy was to focus on maximising warmth and comfort in our living room, where most of the family spends most of each day in winter, to shave as much as another 1MWh off our current ~4MWh/y space-heating demand.
FAQ
Are you more comfortable now?
Yes. Even on very cold days the smaller radiator seems to be plenty, and there are no cold draughts.
Did IWI lose you lots of space?
No. Because of the improved insulation and thus reduced heat demand, we were able to replace two large radiators with one small one. That allows us to make much better use of the walls that the old rads were on. So we gained useable floor area.
Was the aerogel expensive?
Yes and no. It was not cheap, but each time we have done up a room including aerogel IWI, the aerogel has been a minority of the cost. The cosmetic work cost more.
Safe Warm Room
Another practical aim is that even if our power/heating fails on a cold winter's day, that room should stay comfortably warm with 3 or 4 people in it, ie from 300W+ of body heat and even without appliances (TV/light). This is also known as "passive survivability", and applies to keeping cool in summer too.
In the longer term I want to replace the glazing, eg with triple glazing with a whole-window U-value well under 1W/Km^2. For now, our improved curtains from 2009 will have to hold the fort, with extra thermal/reflective "black-out" linings... (I have been battling for months to try to get sensible quotes, but it's hard work, so it may be next year before this is resolved.)
(If I was feeling really adventurous I could attempt to get pricing for VIG, ie Vacuum Insulated Glass, with a smallish vacuum gap between just two panes effectively blocking all conduction (and convection). We have a restricted outside temperature range, maybe -10°C to 40°C max, so mechanically it would be just about plausible.)
We already used the highest-tog-rated underlay available when we replaced the carpet in 2009 (though at tog 2.3 still only ~4W/Km^2). Given the SAP report floor U-value of 0.79W/Km^2 and the underlay of ~2.3 tog (and assuming 1.0 tog for the carpet) gives us ~0.63W/Km^2 overall (1tog = 0.1Km^2/W), thus plenty of room for improvement if we can't find a way to use the floor thermal mass constructively, eg by insulating around its perimeter.
This project is to superinsulate and improve other thermal elements of the room:
- Superinsulate the exterior (north and west) walls, to get the U-Value below 0.3W/Km^2.
- Better insulate the ceiling (with insulation above new plasterboard), to avoid heat lost by unplanned ventilation and conduction upstairs.
- Replace the radiator with a smaller and more-efficient model, and move it to an inner wall to help minimise heat gradients/losses.
We initially planned this with Kingspan Kooltherm K17, but I realised that this might be a good opportunity to test Spacetherm aerogel so that was substituted in the plans, but it was still many times the price for similar performance (>£100/m^2 for 40mm insulant) even with Proctor's generous discounts and direct sale to us, though I did take the opportunity of the improved R-value to up the spec a bit.
Spacetherm-P Arrives
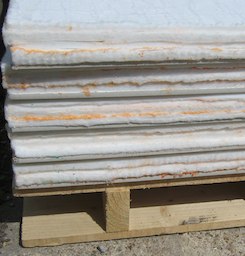
We ordered 5-off 2440mm x 1220mm Spacetherm-P 40mm aerogel faced with 9.5mm plasterboard on 2010-05-05 and it was with us less than a fortnight later.
The overall U-value of the Spacetherm-P should be ~0.30/Wm^2 (40mm aerogel at 0.013W/Km and ~9mm plasterboard at 0.14W/Km).
Insulation Works
Work started 2010-07-13 and took two days to tear down the ceiling, insulate above new plasterboard, and put up the aerogel Spacetherm-P. Early on we made a couple of exploratory holes in the plasterboard of the exterior walls to check the construction, and rather than a void, behind the 12.5mm plaster is a ~0.5" fibre matt enclosed in a plastic lining, which seems in fairly good nick, eg no obvious sagging. So my U-values will be better than the 2.0W/Km^2 that I'd feared or the 0.8 that the SAP tables gave for the energy certificate; possibly closer to 0.6.

Given various assumptions about the existing wall thermal performance it is possible to estimate the performance of the superinsulated walls though thermal bridging from door/window frames and steel drywall screws, etc, will reduce overall performance:
- existing wall ~1.8W/Km^2 (eg 12mm plasterboard, 50mm cavity, 102mm outer brick leaf) then new wall performance ~0.27W/Km^2
- existing wall 0.8W/Km^2 as per SAP calculations then new wall performance ~0.21W/Km^2
- existing wall ~0.6W/Km^2 (eg 12mm plasterboard, 50mm rockwool, 102mm outer brick leaf) then new wall performance ~0.20W/Km^2
See images of the work.

Taking down the old plasterboard, putting glass wool above it ie in the void below the plywood of the floor above (100mm, ie to about 1/2 of the 9" depth, for a U-value of ~0.4W/Km^2) and putting up the new plasterboard seemed fairly straightforward. There is a little extra packed around the microbore central-heating pipework as lagging where it crosses the living room ceiling above the plasterboard.
(The packaging claims that the glass wool is made from recycled bottles.)
The ceiling U-value may have improved from ~3 to ~0.33W/Km^2 (12mm plasterboard, 100mm glass wool, ~15mm plywood of floor above). So considerably less heat should leak uncontrolled up into the bedrooms where it is generally not needed during the day. On very cold days the radiator TMVs on their normal daytime 'frost' setting may come on a little at times, reducing central heating savings.

Note that the noggins at the exterior edge of the ceiling void were covered with reflective foil faced rigid foam (Xtratherm) up to 80mm thick (with one foil face towards the exterior).
The aerogel board seems to be tricky to work with, for example it snags an electric drill bit making it hard to withdraw, it is very hard to cut with a Stanley knife, and only an electric skilsaw seems to be effective. The builder said that as a consequence it's much slower to work with than alternatives such as Kooltherm, and with the dust being horrible too, he'd rather not work with it again!
Radiators

The old radiators have been removed and the underfloor microbore feeds to them disconnected entirely from the central heating system to avoid accidents. The new living-room radiator will be plumbed directly to the boiler with 15mm pipe, and the existing/remaining two downstairs radiators will be reconnected to the old pipework directly with 15mm pipe, bypassing the old microbore.
The new radiator will be double-layer and consequently can be (less than) half the width of the single old radiator replaced.
The new radiator will be mounted on the internal wall to reduce direct heat loss through the external wall and maximise space in the room.

Plastering and Painting
Plastering was done with a binding layer in corners/vertices, then two layers, and was visibly dry after a couple of days, but is getting a week's drying time total.
2010-07-18: the plastering has gone quickly, with the hot sunny weather probably helping.
We had a slight excitement when the RCD circuit breaker for the mains sockets tripped after a little wet plaster strayed near the wires for a socket, unnoticed by anyone and clearly no arching nor shocks or whatever, so it did its job splendidly!
Internal dimensions of the room surface to surface are approx 4.73m x 3.09m x 2.33m, ie about 15m^2 floor area, with about 18m^2 of interior wall area inside our exterior west/north walls. 7m^2 of that is the north wall, while the west wall has two 1.48m x 2.08m window openings ie ~6m^2.

Having pondered the effects of the unexpected bonus plastic membrane behind the plasterboard, I realise that it will form a vapour barrier. The usual rule of thumb as I understand it is to have such a barrier 1/3 of the way from the warm side to the cool side (thermally) so that the inside will generally be above the dew point to avoid condensation which might result in dampness, mould and rot. The existing membrane is now way way further out than that thermally, so to try to minimise vapour migrating towards it from the inside we will vapour-tape the edges of the aerogel around the door reveals, and try to find a vapour barrier primer paint coat, oil or latex based.
Having asked on the Green Building Forum to comment on this scheme, "Saint" pointed out there's foil between the plasterboard and the aerogel. That could serve nicely as the warm-side vapour barrier, so as long as we are careful to block routes past the foil, eg at the exposed aerogel at the window reveals and at areas of damage, most of the work is done.
However, since we did not seal/tape at the front of the boards, though all the joints were at least partly filled with foam, there's a possible moisture route through the skim into the gap between boards, so an impermeable paint base coat still seems to be a good idea, else we might have to gouge out the plaster and reseal there worst case.
Again "Saint" came up trumps with Gyproc drywall topcoat: "Acts as a vapour check when 2 coats are applied." Could be just the thing...
2010-07-23: skirting board and plaster coving has gone up, and socket wall boxes fitted.
We are going to use a vapour-check drywall primer over all the newly-plastered surfaces and over the coving, and use an oil-based paint on the foam-sealed skirting board, to minimise air and moisture movement out of the room.
Due to a misunderstanding, the first primer coat on was breathable/permeable, but two coats of Gyproc Drywall Sealer have gone on top to provide vapour control.
2010-07-28: after three days all the priming and painting was completed, including skirting and the previously-unpainted internal door.
Wrapping Up and Updates

2010-08-23: all the radiator pipework fitting and re-routing has been done (and our microbore pipework has been banished from downstairs!) and the plastic reveals for the windows have been put in. The curtain rails were put back up for us.
2010-08-25: having not seen any leaks from the radiator pipework I briefly turned the central heating on and bled all the rads again; everything seems to be working fine.
2010-08-27: last night Jean put the curtains back up and today we had most most of the finishing touches done such as caulking the wall penetrations for the radiator pipework. Short of a couple of tiny paint touch-ups, we're done!
2011: April, broken main set of patio doors was upgraded to Ug=1.
2012: March, the house officially became a 'SuperHome' (119); May, Ed Davey (Secretary of State for Energy and Climate Change) came to visit; September, the final old set of patio doors is replaced with 3G.
Estimates of Thermal Performance
For the various elements of the room, and ignoring ventilation losses, my end-July 2010 estimates for their effective U-values are:
- Ceiling (15m^2): 0.33
- Floor (15m^2): 0.63
- Exterior walls (12m^2): 0.21
- Old double-glazed doors (6m^2): 2.7 (as per SAP) [~1 as of 2012 with door replacements]
- Internal walls (16m^2): probably ~1.8, to next door and to kitchen
- Internal door/surround to corridor (2m^2): probably ~2.0
As of July 2010 I can probably assume that the overall U-value (especially for the external walls/windows) is a little less than 1W/Km^2, with the windows dominating. Thus for 18m^2 of external surface and 300W (3+ people) in the room we could sustain a temperature difference above external of about 17K/17°C without heating, which given our normal daytime thermostat setting of ~18°C suggests that we should not need to heat that room until the external temperature drops below freezing. Average daily temperatures in London are essentially never below 0°C, so in principle we will now be mainly OK even if the heating fails. Even in rather harsh January 2010 there were only 17 degree days below zero (and less than that in total in the few months around it). Clearly other parts of the house need heat too, if for no other reason than to protect pipes from freezing, etc.
As of 2012-09 with 3m^2 of new patio door at Ug~1 and 3m^2 of now-3G-window at Uw~0.8, ie having more than halved the heat loss of the worst 10% of the room surface, possibly even more because of probable improvements to air-tightness, then it might be reasonable to hope for a ~5% reduction in heat demand.
Future Work
We're getting reflective/thermal blackout blinds to hang behind our curtains, to help keep out unwanted sun (light and heat) on summer afternoons, and better retain heat in winter. We have tested the same make of blinds on another west-facing room, and it certainly helps keep the room cool in the summer afternoon/evening.
In general I should check for and remedy thermal bridges and air leakage. A particular potential area of trouble is the internal plasterboard/stud wall between the living room and the kitchen; is it ventilated to the outside, and if so should that be fixed or would doing so risk rot for example?
(Livingston was very helpful 2010-07-19 saying that a typical low-end thermal camera with a USB connection to extract images from it would cost somewhere round £300--£400 for a 3-day hire which could be over a weekend, which would probably cover me. Ashtead Technology had a 2-day minimum hire for a little over £100/day for similar, so getting hold of this equipment is not prohibitively expensive or difficult.)

On a reasonably chilly February evening I borrowed a Flir b40 thermal camera, and went hunting for cold spots from the inside and warm spots from the outside. I'm pleased to say that things seemed to be generally fine. See all the images and compare with a grown-up's efforts.
If the room air-tightness improves enough I will consider including MHRV (Mechanical Heat-Recovery Ventilation), possibly in conjunction with the kitchen, with another unit in the bathroom or toilet or on the upstairs landing to help ventilate upstairs in particularly cold weather. I'll be keeping an eye on relative humidity to help decide what needs doing.
2011-01-11: Had a possible brainwave about external wall insulation (EWI) of the whole of the north wall to improve the other three rooms behind it, ie the kitchen and two bedrooms. Many opinions to be had on GBF of course, including, from Viking House (Seamus):
I think you should pump the cavity between the brick and the TF and then externally insulate with EPS.
...
At the moment your bricks are wet/porus/damp and any moisture getting through the brick can theoretically cross the cavity along any ties installed sloping down towards the timber frame or along any mortar that fell on the wall ties. This is why its not recommended to pump the cavities in a timber frame house to allow the ventilation to dry out any moisture that might travel along the wall ties. I don't agree with this as timber frame wall ties are L shaped and the timber frame has a membrane to shed water.
If you externally insulate, the brick now becomes bone dry, the risk of moisture ingress is eliminated, you can then pump the cavity to stop air movement the 2 layers of insulation because the moisture that could jump the cavity has been eliminated. The timber frame now becomes similar technically to a timber stud when drylining the inside of a partial filled cavity wall.
Glazed expression
The glazing also needs to be seen to in due course, as mentioned above.
I did not start to get quotes that I felt comfortable with until September and I do not fancy having no windows in the middle of November during fitting, so this is a part of the project to leave until next spring.
Here's a few notes which might help me remember and help someone else too...
The substance of my request has been:
- one fixed window 1450mm x 2050mm
- one set of 1450mm x 2050mm french doors
In both cases I wish to minimise whole-unit U-value, below 1W/Km^2 for the window and as good as we can get for the doors.
Note that all the current windows/doors in this house (and neighbours') are white uPVC, so to fit in, and to minimise maintenance, that is preferred.
"Best" first (all prices including VAT):
- EGE: each unit Uw below 1.0W/Km^2, ~EUR1500 ex-works
- The best response so far was from EGE (very quick reply on 2010-09-03 from a request on their site IIRC) for just short of EUR1500 ex-works (ie no delivery or installation). The basic structure for each is 88mm profile depth Uf = 1.0W/Km^2, and the glass arrangements (Ug = 0.6W/Km^2) is 4/14/4/14/4 = 40mm. The door is about 2/3rds the total cost.
- Just Doors UK, only door £725 including delivery
- Assumed Ug=1.1 for 1450mm x 2050mm french Doors. (Best Uw available is 1.4.)
- PowerGLAZ (Romag), only window ~£1400 ex-works
- This is only the sealed unit Ug=0.78W/Km^2, but contains 25% coverage with solar PV (50% in the bottom half) for ~100Wp, to provide some shade and generate some power in summer. The glass arrangement is 4+2+4/16/6Plan/12Cav/6Plan. The outer layer is 4mm low-iron with PV laminated to the inside, 10mm total. The 16mm cavity would be Argon-fill. My initial request was 2010-04-29 and the final quote was provided 2010-05-05, which I think is very fast considering the nature of the enquiry.
- Rationel (quote from M A Simmonds) ~£2600 ex-works
- Quote took about 3 weeks and was rather muddled in some respects. The glass arrangement (for 3G) is 4-10-4-8-6.38Lam w/e+Krypton. Uw figures are claimed to be 0.76 for the fixed window and 1.25 for the doors. Delivery is given as approximately 8-10 weeks from receipt of order.
- Warmlite (local glaziers), only window ~£2000 including delivery/install
- My enquiry 2010-03-01 (approx) was based on a slightly different spec with a friendly and almost instant response, but overall Uw not known and a much slimmer design than typical:
We used Warmlite for replacing our ply-and-single-glazed front door with decent double glazing and we are happy with that installation.This window will be split vertically with a small opening fanlight to one side. The triple glazed glass sealed unit specification will be as follows;
4mm toughened Diamant outer pane, 6mm cavity with Krypton, 4mm toughened Planitherm Total, 8mm cavity with Krypton, 4mm toughened Planitherm Total. Please note a warm edge spacer bar cannot be used with this combination.
The glass only centre pane U value would be 0.8W/m2K & g value 0.59.
Cost: [~£2000 inc VAT and delivery/install]
Alternatively, if you settle for BFRC 'A' rated which will be 4mm toughened Diamant outer pane, 18mm cavity with warm edge space bar and Argon Gas and an inner pane of 4mm Planitherm Total giving a centre pane U value of 1.4W/m2K & g value 0.45 the cost will be [~£1000 inc VAT and delivery/install]
- Rawington: together Uw below 1.0W/Km^2, ~£2600 ex-works
- The Ug=0.6W/Km^2 for door and window and Uf=1.34W/Km^2, giving Uw=0.82 for the window and 1.03 for the door. The frames are engineered pine and would require annual maintenance. Glass arrangement "33.1La Sel./14/4/14/33.1La Sel", edge seal "Thermix". Final U-value calculations arrived (after prompting) 2010-08-28, original enquiry having been placed 2010-06-04, so very slow IMHO. The total including delivery and installation was ~£3000. Rawington is relatively local to us and seems to have a good reputation.
- Ecoplus (Green Building Store): each Uw 1.0W/Km^2, ~£3400 ex-works
- Delivery is about £250 with installation not included. A (probably wrong) VAT rate of 15% is quoted, so the prices here are adjusted (up) to 17.5%. The quote arrived 2010-09-07 (with Uw values supplied after prompting next day) against an original request at the very end of August. The proposed glass arrangement is 4E-12-4-12-E4 with Argon fill and warm-edge, with an Ug=0.7W/Km^2 (Ug=0.5 with Krypton fill, giving Uw=0.8). Construction is FSC redwood / oak / aluminium.
- Livingwood Windows Ltd 2012-01-12, fixed window Uw 0.82W/Km^2, ~£737, delivery ~£275, install ~£500 all ex-VAT
- Triple glazed Alu clad window:
2k 1 Soft low 'E' coating, Argon filled cavity with warm edge spacers 3k 2 Soft low 'E' coating, 2x Argon filled cavities with warm edge spacers G1 4mm float inside - 4mm float outside G2 4mm toughened inside - 4mm float outside G3 4mm toughened inside - 4mm toughened outside G4 4mm toughened inside - 6.4mm laminated outside G5 4mm inside - 4mm float outside, obscured
Delivery 8--9 weeks from receipt of signed order confirmation.
Various other requests are still being processed or did not meet my spec especially in being clear on the difference Uw vs Ug. This seems to be an agonisingly-slow business and one that does not inspire confidence given the large-ish sums involved and the marginality of any savings from reduced heat demand.
The new-ish DGCOS (Double Glazing & Conservatory Ombudsman Scheme) was in the end no help to me though pleasant enough to deal with itself, since the only local supplier in their scheme came nowhere near my spec, even when I'd spoken directly to the supplier's manufacturer!
: Emergency Door Replacement
The mechanism of the main set of patio doors finally broke in April 2011, so we had Warmlite (who did our front door) put in the best double-glazing that they could, which was Ug=1.0W/Km^2 (Uw not specified), french doors with double the width of exit before, and a flying mullion for air-tightness. The sealed units are SolaGlas Climacontrol Vertical, warm edge, 4(Planitherm)x16x4mm with argon fill. Completed early May £1544 including install and VAT.
: Other Door Replacement
We signed with Warmlite to replace all the remaining old/blown/leaky 2G units (including the remaining old patio door) with triple glazed (3G) units. Rather than a completely fixed light I was persuaded (for structural reasons) to have a top light (transom) opener, which I think will help ventilation at times when we don't really want to leave the door open at all, eg in rain.
: Other Work
We had the guttering replaced above the (west) exterior wall of the living room that had been overflowing for some time, causing water to to get in through our patio doors onto the carpet and actually leaving water sloshing in the 'sealed' unit, ruining a wooden shed on the patio too, etc, etc.
With this fixed I think that we can stop worrying about water getting in (eg spoiling the new carpet with damp) as well as protecting the fabric of the house and the new insulation.
(Rain is now being collected in a water butt, with overflow to the garden, which should reduce the need to traipse through the living room with a watering can in summer, marginally reduce our water use too, and very slightly ease the strain on the drains/sewers in a rain storm!)
The willingness of insurers or purchasers to accept such a "non-standard" structure was brought up.
Does It Work?
After an exceptionally cold December 2010 (only January 2010 comes close in terms of heating degree days recently) I'd say that it does: the smaller radiator seems to be sufficient, we don't feel claustrophobic, when the curtains are drawn (and the door shut) there are no cold draughts, and generally our gas/heat demand continues to fall relative to HDDs.